How to start using the application?
To start collecting information about employee working hours, you need to follow these steps:
- Register in the application as a Partner;
- Invite employees to your team using an invite code;
- Create a project;
- Add employees to the project.
That’s it! Now you can check the geolocation and request photo verification while the employee’s time tracker is running.
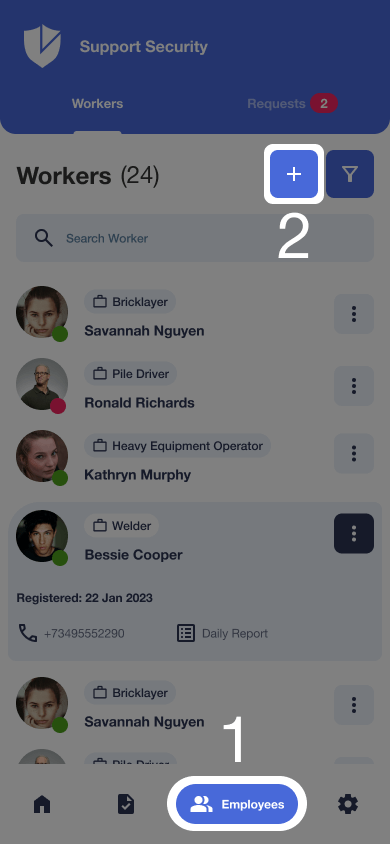
How to add employees to the team?
To assign employees to your team, you need to follow a few simple steps:
- Go to the Employees screen.
- Click on the “+” symbol to open the invite codes management screen.
- Create a code with the necessary settings and copy the code by clicking the button.
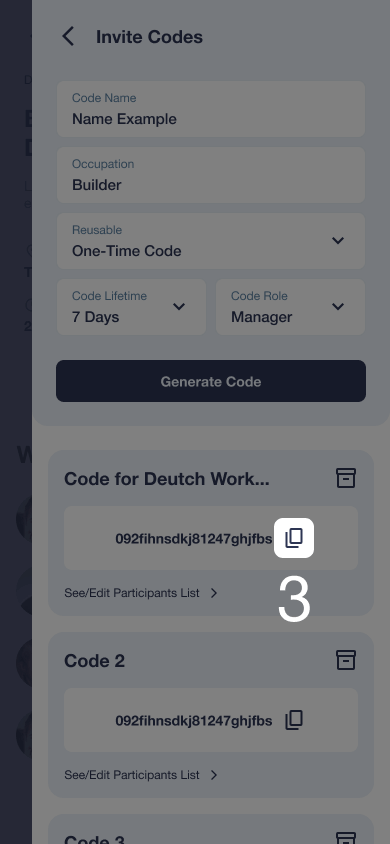
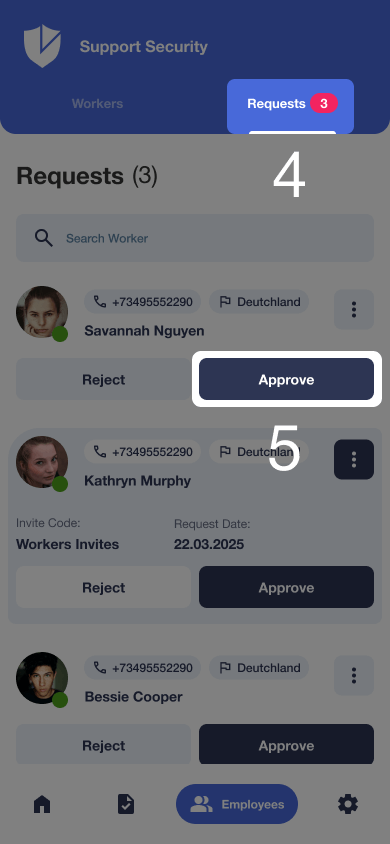
- Share the code with the employee and inform them that the code needs to be entered during the registration stage or on the settings page if the account is already registered. Note: If the employee is already added to another team, they will need to leave it to be able to enter the invite code.
- Confirm the request to add the employee to the team.
What is a project?
The essence of a project is to group employees according to a certain principle, which can be a work object, shift, or team. You can use projects as you wish, create as many as needed, and add employees at any time.
Please note!
To start working, you must have at least one project with added employees. An employee can only be added to one project.
How to create a project?
Go to the Projects screen and click on the button with the “+” symbol.
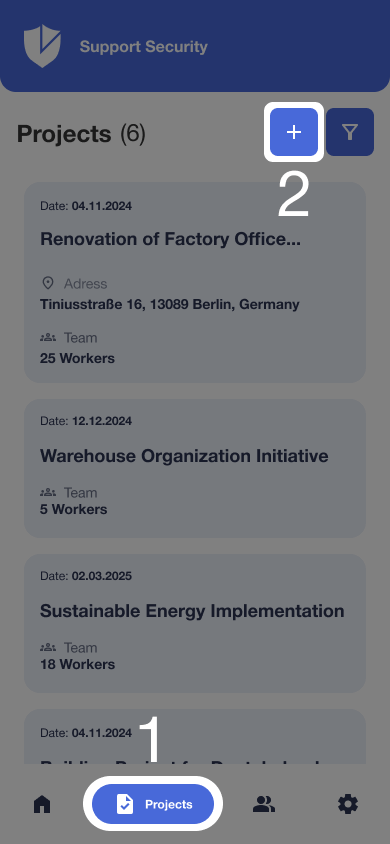
Enter the required information and click Save.
How to add employees to a project
- Go to the Projects screen.
- Create a new project or go to the screen of an existing project.
- Click on the button with the “+” symbol to open the window for adding employees.

- Click on the button with the “+” symbol next to the names of the employees you want to add to the project.
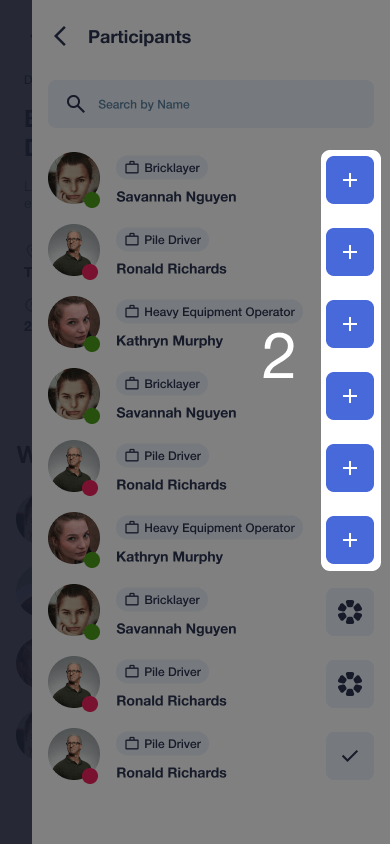
Please note!
An employee can be added to a project only if they are part of your team and not already assigned to any other project.
What is a report?
The report screen shows the details of an employee’s work for the selected day, including working hours, geolocation check times, and submitted photo confirmations. Use this report to analyze completed tasks and monitor employee activity.
Please note!
After generating the report, a notification appears in the Activities Journal section, indicating the need to confirm the employee’s worked hours for the specified day.
The report for the current day is generated after the employee stops the timer.
It can also be created manually in cases where the employee is unable to use the timer.
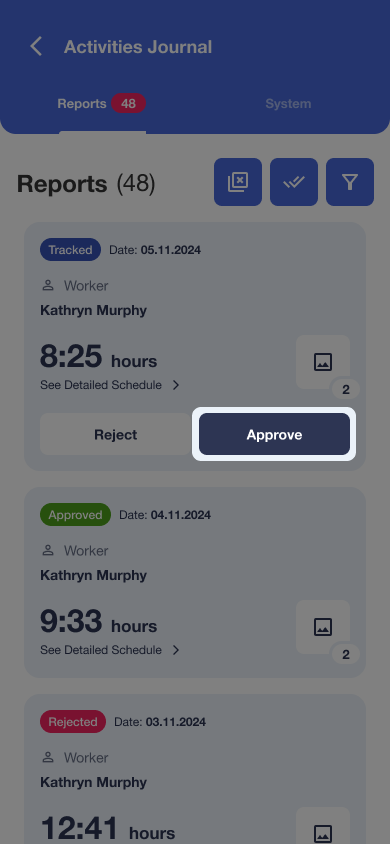
How to confirm the time worked by an employee?
All reports automatically appear in the “Activities Journal” section, where they can be confirmed or rejected all at once, or each one individually. You also have the option to view all reports for a specific project on the project screen by going to the “Reports” tab.
You can accept or reject all new reports using the buttons provided.

If you need to approve a time different from the report time, you can do so by clicking the Approve button. In the dialog box, you can specify a time from 0 to 24 hours.